For years, bicycle headlights were mostly round tubes clamped to handlebars. They worked, but a modern bike cockpit can quickly become crowded with a GPS computer, bell, phone mount, cables, and accessories. One of the most practical cycling-equipment developments attracting attention in October 2026 is the rise of compact, out-front bike lights that fit neatly beneath a computer or into a dedicated forward-facing mount.
The appeal is obvious: a cleaner handlebar, a purposeful beam position, and fewer accessories competing for space. Yet the neatest-looking setup is not necessarily the best for every cyclist. Mount strength, beam shape, runtime, charging, and local lighting requirements matter more than appearance alone. Here is how the trend works and how to build a setup that is practical rather than merely photogenic.
Why Out-Front Bike Lights Are Getting Attention
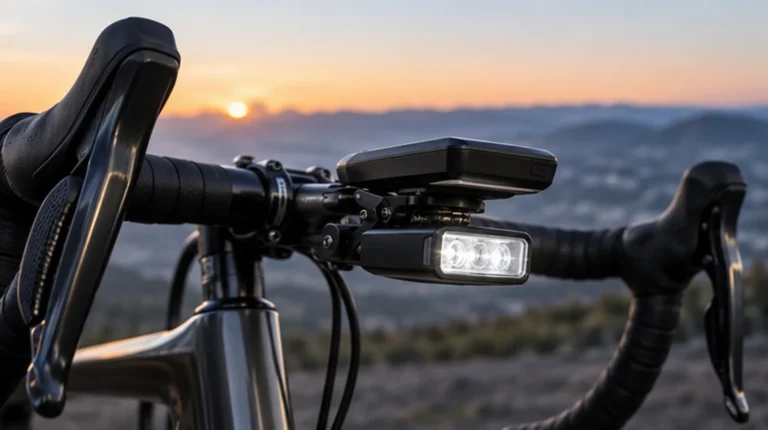
On October 16, 2026, Cycling Weekly highlighted a new generation of compact bike lights designed to sit beneath or ahead of a handlebar-mounted computer. Rather than occupying another section of the handlebar, many of these lights use slim, rectangular bodies and compatible brackets.
This design responds to a genuine equipment problem. Riders with road-style drop bars often have limited usable mounting space, especially when cables exit from an integrated stem. A light suspended beneath the GPS computer can provide a tidy, centrally positioned alternative, provided the chosen bracket is approved for the combined load.
How an Integrated Computer-and-Light Mount Works
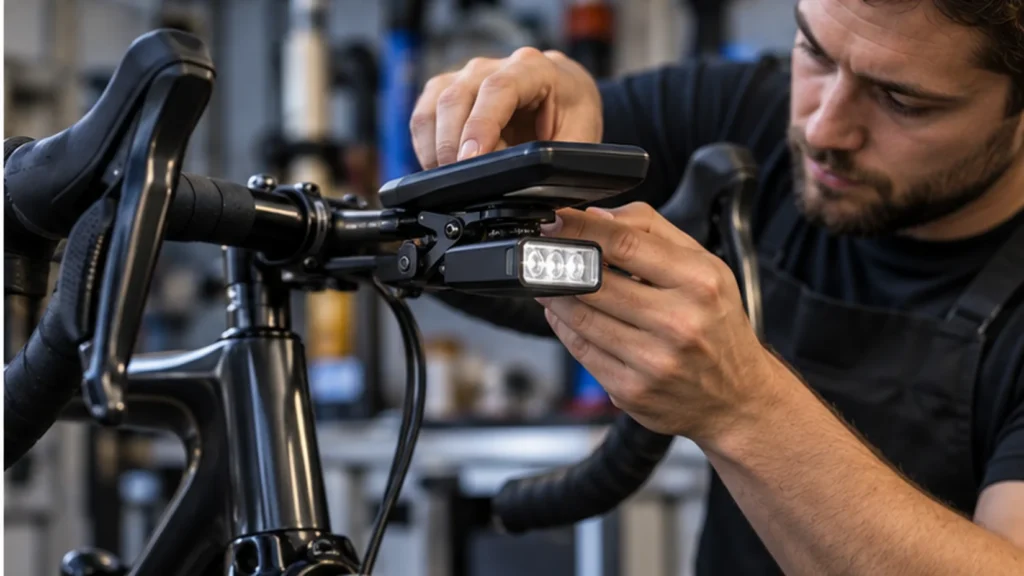
The common arrangement uses a bracket projecting in front of the handlebar or stem. A cycling computer attaches to the top surface, while a compatible light fastens underneath through a secondary interface or adapter. The exact mechanism varies by brand; some use proprietary mounts, and others accept accessories built for widely used quarter-turn-style systems.
There are three important checks before buying a bracket. First, confirm it fits your handlebar or integrated cockpit. Second, verify compatibility with your specific computer and light. Third, check the manufacturer’s permitted weight and the strength of the mounting hardware. A computer-only mount should not be assumed suitable for a large, heavy lamp.
Beam Shape Matters More Than Raw Lumens
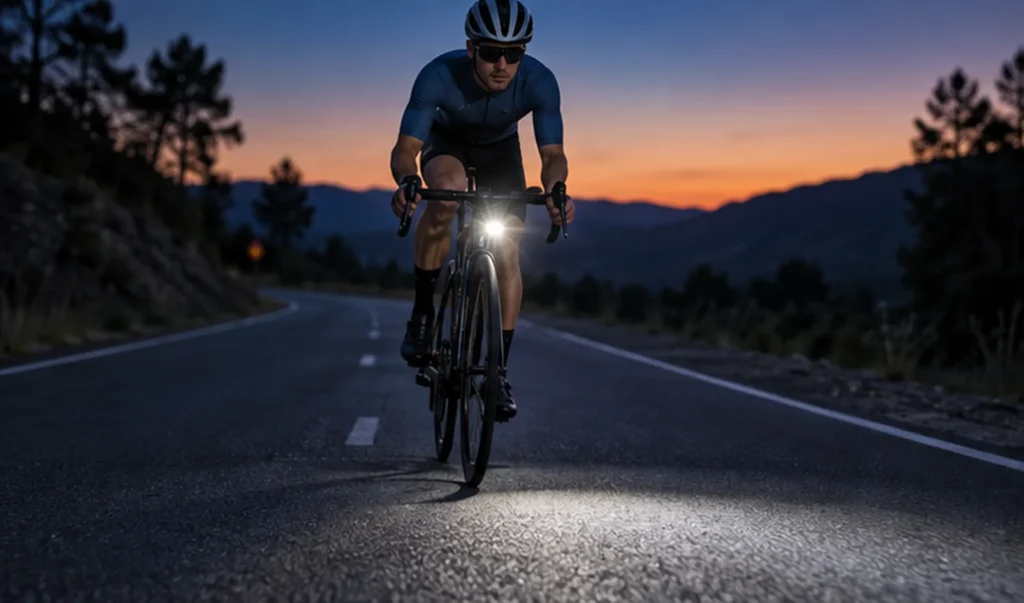
Brightness figures dominate bike-light marketing, but a high lumen number does not automatically create useful road illumination. A light’s optical design determines where its output goes. A broad, unfocused beam might illuminate nearby objects while sending unnecessary light upward; a controlled beam can place more of its output on the riding surface.
Cycling UK’s lighting advice emphasizes matching the beam to the environment and avoiding lights that dazzle other road users. Busy, illuminated streets may call for visibility and a wide field of view, while dark rural roads demand enough forward reach for the cyclist to react within the distance they can see.
Daytime Visibility and Smart Features
Many cyclists also use lights in daylight. Some newer models offer dedicated daytime modes, ambient-light sensors, brake-response features, or app-controlled settings. These conveniences can help riders maintain a consistent routine, but they differ widely between products and should not be assumed standard.
BikeRadar’s 2026 guide to smart bike lights explains how sensors and connected functions can adapt illumination or provide additional rider awareness. Meanwhile, Trek advocates daytime running lights as part of its approach to being more noticeable on the road.
A useful distinction: being seen and seeing the road are not the same requirement. A flashing daytime visibility light might not have the beam distribution or sustained output needed for nighttime riding. Check both functions independently. iBikeBlog’s existing guide to bike lights and visibility technology provides more context on radar and adaptive systems.
Battery Runtime: Read the Small Print
A slim light still needs space for a battery, electronics, and heat management. This creates an important shopping tradeoff. The maximum-brightness setting may run for far less time than a modest daytime or economy mode, and output can reduce automatically as the battery warms or drains.
Look for a realistic runtime chart showing multiple modes, rather than one impressive headline duration. If your typical evening ride lasts ninety minutes, allow room for delays, cold weather, and battery aging. Choose a lamp with a reliable low-battery warning and consider carrying a small backup light on longer rides.
Weather Resistance and Everyday Durability
A bike light mounted in front of the stem will meet rain, grit, road spray, vibration, and occasional knocks during storage or transport. Confirm the device’s stated ingress-protection rating and follow the manufacturer’s cleaning guidance. An advertised water-resistant construction does not mean a product should be submerged or pressure-washed.
The mount deserves the same attention as the lamp. Inspect the attachment screws, plastic locking tabs, adapter, and underside bracket periodically. If any part develops a crack or cannot hold the light securely, replace it before the next ride. A dangling headlight near the front wheel is an avoidable hazard.
For riders who swap bicycles frequently, a quick-release arrangement may be more valuable than a completely flush installation. Commuters parking outside may also prefer a light that can be removed quickly to reduce theft risk.
Check the Rules Where You Ride
Modern styling does not override traffic regulations. For example, Cycling UK explains the required front and rear cycle lighting and reflectors for nighttime road use in Great Britain, including rules affecting lamp positioning and visibility. Other countries, states, and cities have their own requirements.
In the United States, the National Highway Traffic Safety Administration advises cyclists to use a white front light, red rear light, and reflectors at night or when visibility is poor. Specific legal specifications are set at state or local level.
If your fashionable new front light is mounted behind cables, hidden by a handlebar bag, or angled toward approaching traffic, adjust the setup. The lamp must remain visible and useful from the relevant directions. Helmet lighting can supplement, but does not necessarily replace, lighting legally required on the bicycle.
How to Choose an Out-Front Bike Light
There is no single ideal light for every bike. Use the following practical criteria to narrow the field:
- Mount compatibility: Verify the exact computer, adapter, handlebar, and lamp combination.
- Beam control: Favor illumination suited to your road conditions, with a sensible cut-off or adjustable aim.
- Runtime: Compare useful riding modes and allow a battery reserve.
- Visibility: Consider whether a separate daytime or rear light is needed.
- Weatherproofing: Check the published rating and charging-port design.
- Serviceability: See whether mounting hardware and replacement parts are obtainable.
- Removal: Decide whether a quick-release is important for theft prevention or bike sharing.
Who Benefits Most From the New Layout?
Road cyclists with integrated cockpits are obvious candidates because the arrangement reduces clutter around the handlebar tops. Gravel riders may appreciate cleaner routing too, but should prioritize rugged mounts that tolerate vibration. Commuters benefit when the installation lets them keep a bell, brake controls, and hand positions unobstructed.
The broader context is the evolution of practical urban riding technology. For related ideas about balancing new equipment with everyday usefulness, see iBikeBlog’s article on urban cycling commute optimization.
Install and Test Your Light Before a Night Ride
Start with the manufacturer’s recommended hardware and tightening instructions. Attach the computer and light, confirm that neither interferes with cables or controls, and turn the handlebar fully left and right. Aim the light on level ground so its most intense portion illuminates the path rather than directly striking other road users’ eyes.
Then take a short test ride in a low-risk setting. Check the beam while turning, braking, and rolling over uneven pavement. Make sure the mount does not rotate and the computer remains readable. Finally, test the rear light and confirm you have sufficient battery charge for the whole trip.
The Bottom Line
Out-front bike lights are a genuine and timely refinement in bicycle equipment design. They can free up handlebar space and create a tidy, functional cockpit, especially when paired with a compatible GPS computer. The best systems combine that convenience with a stable mount, appropriate road illumination, enough runtime, and straightforward maintenance.
Before upgrading, start with your riding conditions rather than a sleek product photo. A thoughtfully positioned conventional light remains better than an integrated model that does not fit securely or light the road properly. In 2026, smarter cycling gear still succeeds by solving everyday problems.